Canva is a popular online design platform allowing users to easily create beautiful designs. Whether you're designing business cards, flyers, or posters, Canva provides a range of templates and tools to help you bring your ideas to life. However, once you've finished creating your design, you'll need to prepare your artwork for printing. In this article, we'll look at how to prepare artwork and choose the right file format for printing from Canva.
Step 1: Choosing the right template
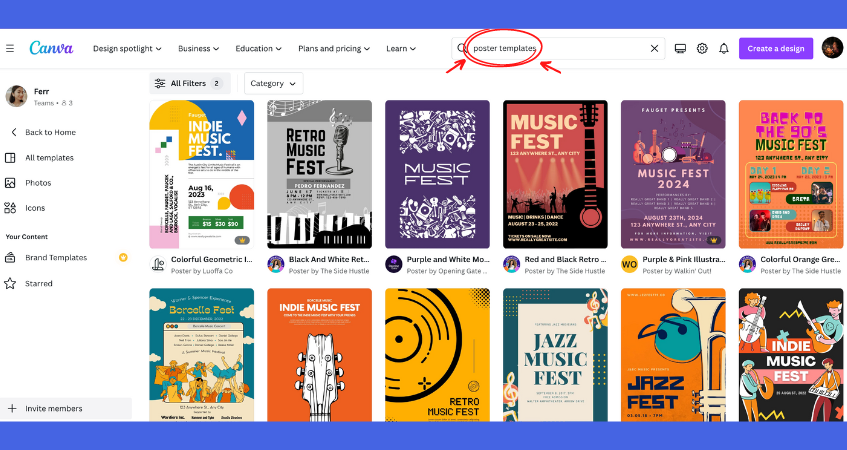
Before you start designing your artwork, it's important to choose the right template. Canva provides a range of templates available for commercial or professional printing products such as templates for name card printing, or more common products such as flyer printing and greeting card printing. In this article, we choose a poster as an example to show you the A to Z guide to prepare the artwork file for commercial printing. Please note that the steps are the same for all products! :)
When selecting a template, make sure it's the right size and format for your printing needs. For example, if you're designing a poster, you'll want to select a template that's suitable for A1, A2, or A3 sizes. Additionally, you can always adjust the size of the file according to your desire.
Step 2: Designing your artwork

Once you've selected your template, it's time to start designing your artwork. Canva provides a range of tools to help you create beautiful designs, including text, images, and shapes. When designing your artwork, keep in mind the printing process. For example, if you're using images, make sure that they are uploaded in a high-resolution format so they will not appear blurry when printed. You should also avoid using small text, as it may not be readable when printed.
Step 3: Add Margin and Bleed
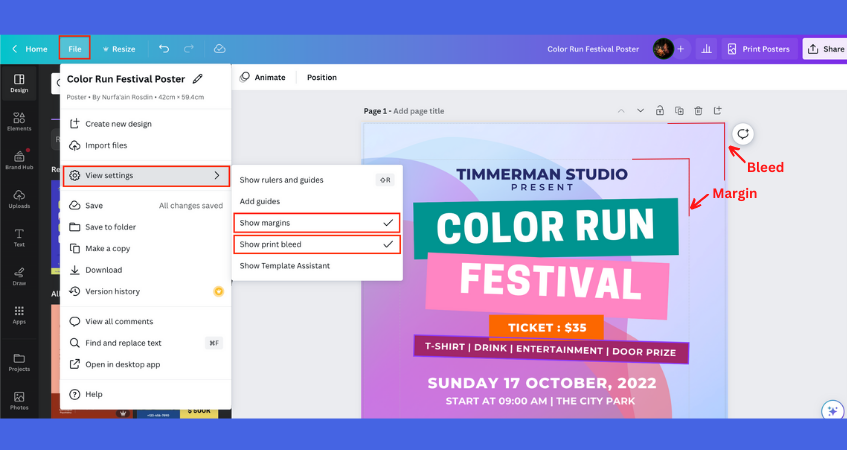
After finalising your design, you might want to give attention to the file preparation process, it's important to set up your bleed and margin correctly before sending it off to the printers. Initially, our advice for the bleed size is 3mm. This advice strictly applies to all software when preparing your artwork for printing. If you are using Adobe Photoshop or Illustrator, you can follow the guides here on how to set up bleeds and margins in your artwork.
Unfortunately, the bleed setting in Canva is fixed and cannot be changed. Therefore, to avoid any risks, it's best to ensure that all of your important text, visuals, or design elements are not too close to the edge or within the margin. This means that you'll want to keep your important design elements within the safe area of the document. You can refer to the picture above to understand where are the bleed and margin located in your design. By taking the time to adjust your design and ensuring that everything is set up correctly, you'll be able to send your artwork off to print with confidence, knowing that it will turn out as you intended.
Step 4: Exporting your design
Once you've finished designing your artwork, it's time to export it for printing. Canva provides a range of file formats for exporting your design, including PDF, PNG, and JPEG.
If you're printing your artwork on a commercial printer, you'll want to use a high-quality PDF file. Now here’s the step-by-step to get the right file format for printing your artwork with Gogoprint.

To download the file, click on Share > Download
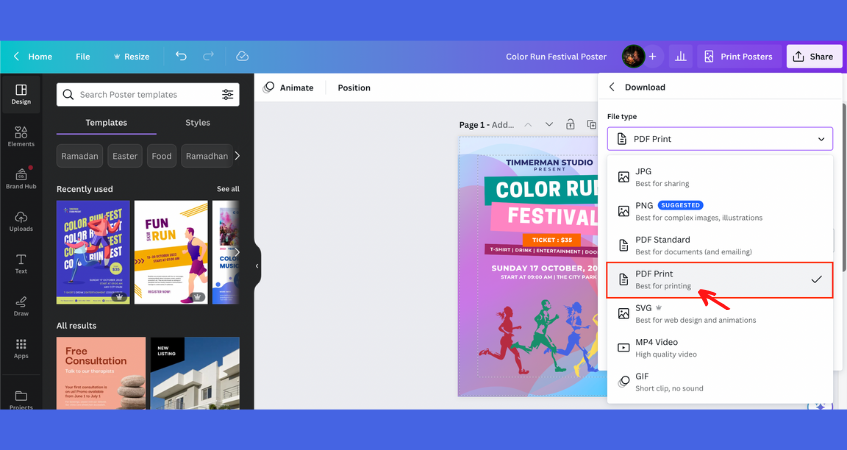
Choose the right file format for commercial printer > PDF Print
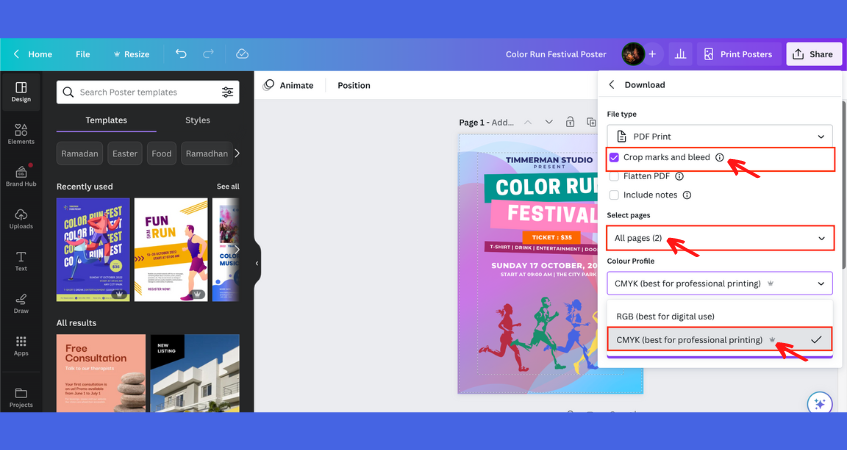
Under the PDF Print file type, select > Crop marks and bleed > select the page(s) that you want to print and > choose CMYK colour profile > select Download > Done!
Understand the Canva Printing Format
1. PDF
PDF is a popular file format for printing because it preserves the quality of your artwork and allows you to embed fonts and images. When exporting your artwork as a PDF, make sure to choose the "PDF Print" option and select the appropriate settings, such as the colour mode and resolution.
2. JPEG & PNG
When Preparing file formats for printing, it is more advisable to use JPEG files rather than PNG. JPEG provides more flexibility in terms of colour format, as it allows for both CMYK and RGB colour profiles, while PNG only supports the RGB colour profile. Additionally, PNG files are typically used for web applications due to their smaller file size, whereas JPEG is commonly used in printing due to its ability to produce better visuals as the file size is usually larger, making it more suitable for high-quality printing applications.
When exporting your artwork as a JPEG, make sure to choose the appropriate size and resolution. JPEG file is best for complex images and illustrations. However both JPEG and PNG are raster formats, so they may not be suitable for printing on larger formats, such as posters or banners.
Step 6: Checking your artwork
Before sending your artwork to the printer, please check it for errors. Make sure to check the spelling and grammar, as well as the placement of images and text. You should also check the resolution and colour mode to make sure they're appropriate for your printing needs.
Step 7: Uploading your artwork
Once you've checked your artwork, it's time to upload it to your printer. Most printers have an online platform where you can upload your artwork and choose the printing options. Make sure to follow the printer's guidelines for uploading artwork, and select the appropriate printing options, such as the paper type and finish.
Canva is a powerful tool that enables non-professional designers to create designs that look like they were created by a professional. However, it is crucial to understand how to prepare the artwork and file format before sending them to a commercial printer. This guide aims to provide you with the necessary knowledge to ensure your designs are print-ready. Additionally, don't hesitate to request a print proof before finalizing your design, and our artwork and design team are always ready to provide you with further assistance if needed. With these tips, you can confidently create stunning designs that are print-ready and deliver the best possible outcome for your project. Last but not least, Happy Design and Happy Printing!